Hiking To Upper Yosemite Falls in Yosemite National Park
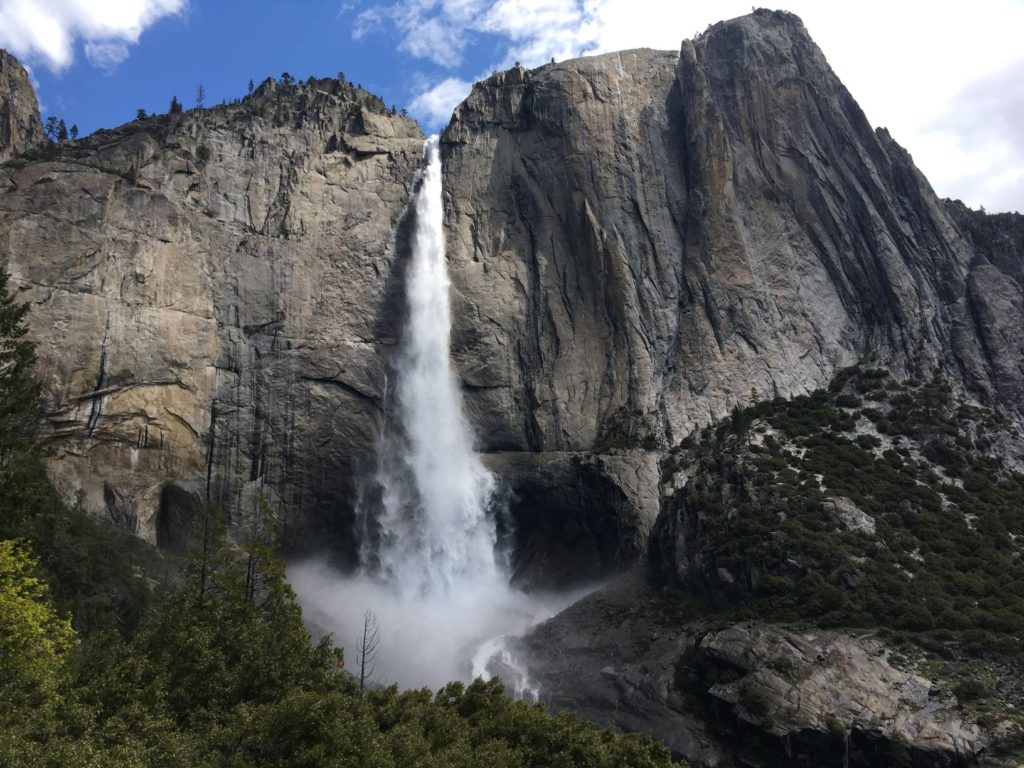
Yosemite Falls is the centerpiece of Yosemite Valley. Actually, that honor might go to Half Dome, or maybe El Capitan. It is at least a conversation starter. Regardless, Yosemite Falls is yet one more feature that adds to Yosemite’s milieu. This waterfall is the highest in North America, and its presence commands the attention of all valley visitors.
But don’t just have to sit idly by and stare at the thing. Instead, a convenient hiking trail has been carved up the cliff side. This strenuous, calf burning trail takes you right up to the lip of the falls. Right to the dramatic point where Yosemite Creek makes the abrupt transition from an ambling, gentle stream, to apical, free falling speed demon. This is Yosemite’s Event Horizon-where gravity has ultimate dominion.
It was June 1st, 2019 that I was given another chance to hike the Upper Yosemite Falls trail. I had attempted it some years prior, but my efforts were turned back near the top. From that day on, I vowed to see the end.
I took to the climb with a vengeance. Fellow hikers would see me strolling proudly up the switchbacks, perhaps distracted by my obnoxious green trail runners. This is the story of my successful ascent of the Upper Yosemite Falls trail. Read on, and I will tell you all about it, and maybe give you some useful information to plan your hike.
The Stats
Table of Contents
Difficulty: Strenuous. Few other Yosemite trails top this one for sheer physical difficulty.
Distance: 7.2 Miles round trip.
Time to Hike: With plenty of stops, it took me about 5 hours round trip, including the extra leg to Yosemite Point.
Shuttle Stop: #7 at Yosemite Lodge. Begin by crossing the road to Camp 4. You can’t miss the trail.
Heights?: You Betcha-these falls plunge 2,425 feet.
Frights?: Enough for one afternoon
The Hike
The Upper Falls trail is the big sister to the Lower Falls trail . If the Lower Falls trail is the free Baskin Robbins flavor sample, then the Upper Falls are a three scoop, deluxe cone with all the toppings. I get both, because I have a pronounced gluttonous streak.
Both trails take you to the same waterfall, albeit entirely different parts. With a marked difference in difficulty, one is easy, and ideal for families looking for a genial afternoon. The other is made for day hikers pining for a tough challenge.
Hiking the Upper Yosemite Falls trail is a full value experience. It is switchback after switchback, and the climbing rarely relents. If you keep an even pace, the hiking goes by quick. Sometimes, you get rewarded with a full frontal, uncensored view of the Upper Falls. These are often good places to rest under the guise of taking a photograph.
There are a few flat sections that allow for a bit of rest, but this trail may still prove challenging. Even the most fit hikers might not make it off the trail without sore feet. Your best hiking shoes, trekking poles, and a bottle of ibuprofen will prove essential.
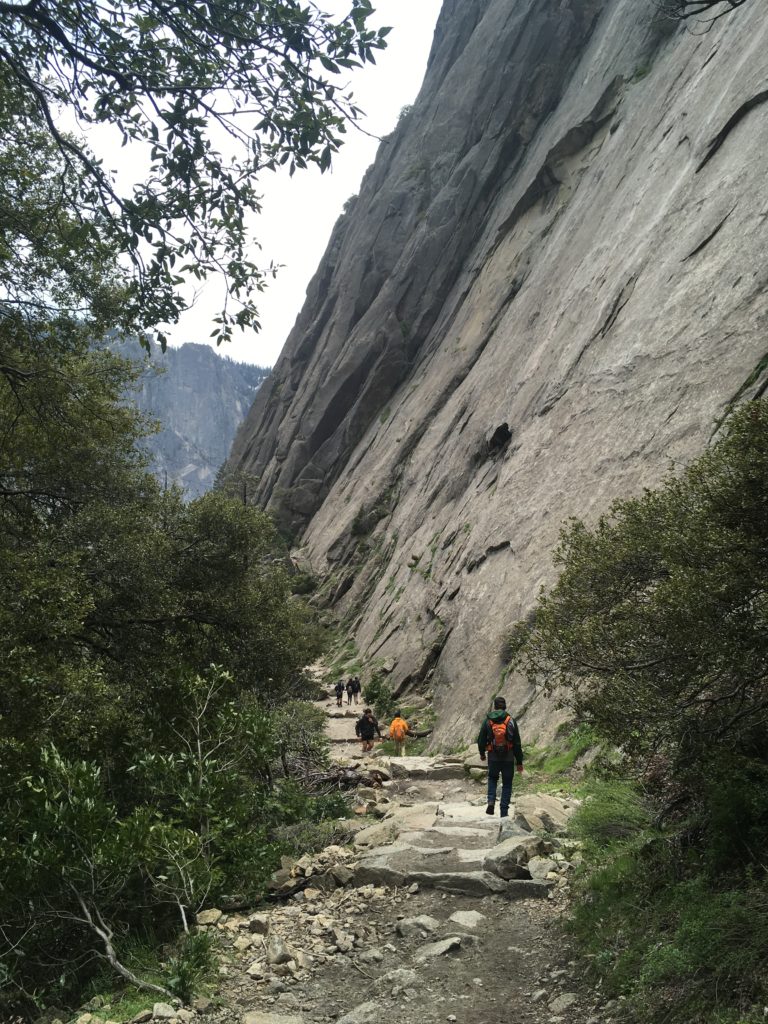
As you hike along the cliff side, the Upper Falls trail follows the path of least resistance. The switchbacks begin immediately. They are rocky, slick, and full of tripping hazards. They take you up and along a terraced cliff west of the falls. These cliffs are a popular rock climbing area known as the Five Open Books . Joining the hordes of hikers will be climbing parties, descending the trail on their way to enjoy a cold beer down at the Mountain Room bar.
Though shaded, this section receives the most sun exposure of any part of the hike. Bring plenty of water, and adequate sun protection. Keep at it, because soon enough, you will round a corner into much cooler environs.
The Gully

Looking at Yosemite Falls from the Valley floor, you’ll see a large, rocky gully laying directly to the left. This gully marks the second half of the hike, and is criss crossed by ever more switchbacks. Many find this section to be the most challenging, particularly if they did not save some energy during the initial sections.
Though no less challenging, this is the part of the hike with the best views. As I said, you get a full view of the falls, and the spray floats up to cool you off. It is a welcome, shady stop that will ready you for a final summit push. The gully also sports the best photo opportunities.
There are plenty of cool, shady overhangs in this section to rest your tiring calves. In a wet year, snowmelt may still be trickling down the trail, creating little waterfalls here and there. I wish I had packed along my water purifier. I ran out of water near the top, and taking from these trickling streams would have saved me from experiencing mild dehydation.
No matter how often you stop to rest, keep hiking. You are almost near the top of the falls, and the payoff for all of your hard work is spectacular.
Yosemite Falls Overlook-Short, Sweet, and Exposed

The final, tail end of the Upper Falls Trail is flat, wide, and offers a good rest spot for looking over the valley below. This is not the very end, however. No, the very end of the hike brings hikers to the lip of the Falls, where all that snow melt water finally takes the plunge into Yosemite Valley.
Many people will be resting atop this flat, comfy expanse. To reach the lip of the falls, follow a handrail past a few boulders. A ramp will take you down to the top-the culmination of all your hard work.
Yosemite Falls-America’s most unrunnable rapid.
Another waist high handrail guards this section. Many photographers like to duck through a gap in the rail, and find a steady stance to snap a picture. Personally, I wouldn’t do that unless I was harnessed in. If you’re daring, go ahead a get that photo. I’ll stick to sucking down almond butter packets well behind the rail.
Yosemite Point
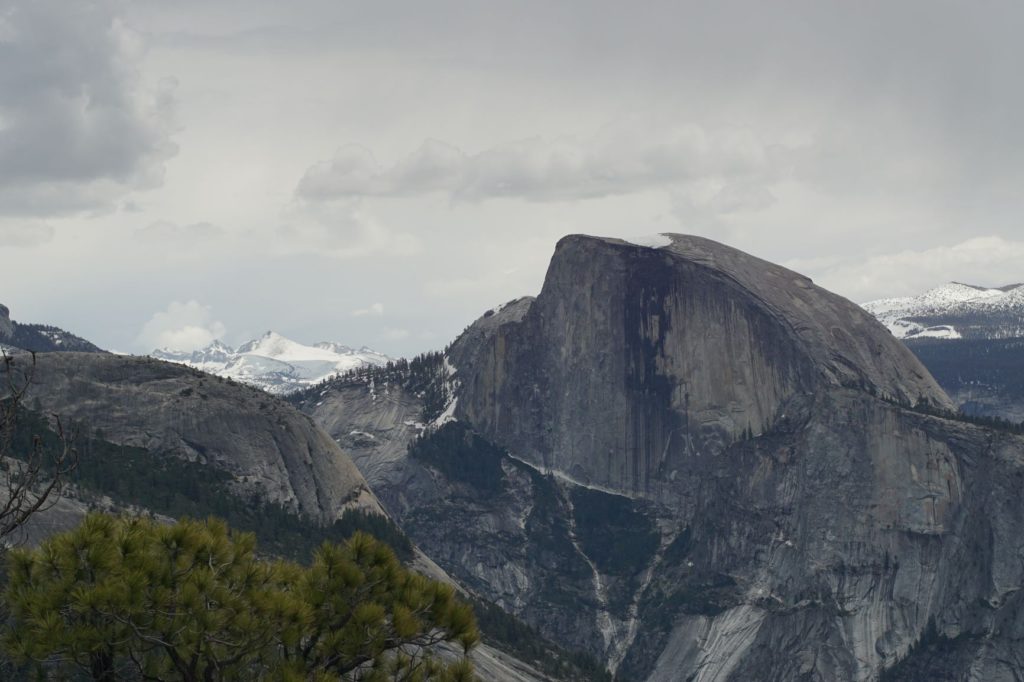
If you’re not too tired from the hike, consider taking the extra leg to the Yosemite Point overlook. It is about .8 miles further, but it is totally worth it. Yosemite Point is is very similar to the popular Glacier and Taft Points, except you are awarded with nearly opposite views. From Yosemite Point, you can get an amazing view of Half Dome’s northwest face, framed by views of jagged, High Sierra peaks just beyond. It’s like a family photo, but Half Dome is hogging the camera. Given 2019’s hefty snowpack, I almost got the sense that I was staring across to Antarctica, or maybe the Greenland Ice Sheet.
The short extension to Yosemite Point takes you through a landscape of entirely distinct character from the jagged exposures of Yosemite Valley. It look more like Tuolomne-a region characterized by dozens of smooth, glacier molded granite domes. The elevation in this area is high enough that snow piles were persisting into early June.
Like Taft Point, Yosemite Point is another well known highlining area. Just off the path is Lost Arrow Spire – a big, pointy rock that teeters near the falls. Getting to the spire requires scrambling beyond the trail, so please be careful if you do choose to take a peek. Climbing and highlining in this area is subject to seasonal closures. Peregrine Falcons love to make their nest in these cliffs. Pay heed to these closure, lest you ruin the adventure for us all.

Conclusion-Why You Should Check Upper Yosemite Falls
Yosemite Falls is the biggest, baddest waterfall in North America. If you’re up for the challenge, hiking to the top will give you bragging rights. Not everyone who starts this hike makes it to the top. Of course, this should present no real challenge to you, the expert adventurer.
Only in Yosemite National Park can you find a hike that is so trying, visceral, and beautiful. Make the climb up Yosemite Falls, and leave the park as a conqueror with sculpted legs.
Need Gear?

Hiking in Yosemite is an unforgettable experience. After spending literal months of my life, hiking, camping, and climbing all over Yosemite, I know what gear I always need to have with me, and what I can leave at home. Before your set out on the trails, make sure you’ve got the right gear to keep you safe, happy, and most importantly-looking good. Check out my list of Essential Day Hiking Gear to find the best stuff for your hike.
- The Best Campsites Around Big Bear California - February 26, 2021
- Hiking to the Hollywood Sign Via the Brush Canyon Trail - July 13, 2020
- Dirt Cheap Hiking and Backpacking Gear: The Most Affordable Gear on the Internet - July 4, 2020